This website is Work-In-Progress (as of 25th of February 2026). Give us some time to fill this pages with content.
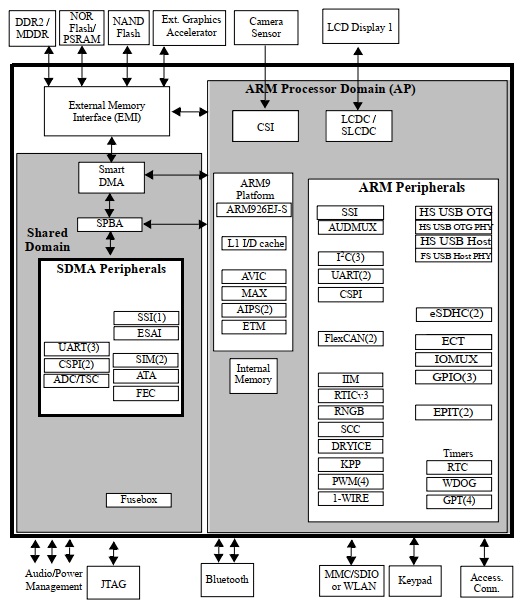
The X32 uses an NXP i.MX253 as the main-processor. This little microcontroller has a bunch of peripheral interfaces like external RAM, display-support, SPI, I2C, UART, PWM, Audiointerfaces, USB and much more.
When I started reverse-engineering the X32 in May 2025, I realized that the i.MX25 is supported by the Linux-kernel. There is a special imx-linux-kernel available from NXP directly, but it turns out, that the mainline-kernel has support for it as well.
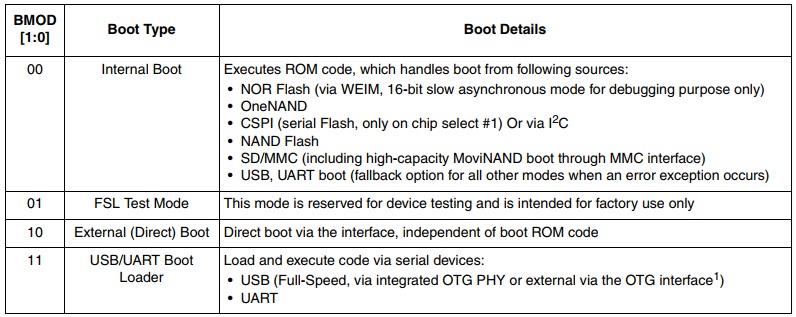
The i.MX253 has several boot-modes so that it can boot via USB, UART or a connected SD-Card. As the X32 has an internal SD-card as the main-storage this was my first idea, but then I’ve found a solution to boot via the USB-interface which was quite convenient as I did not have to change the content of the SD-card and could preserve a working device.
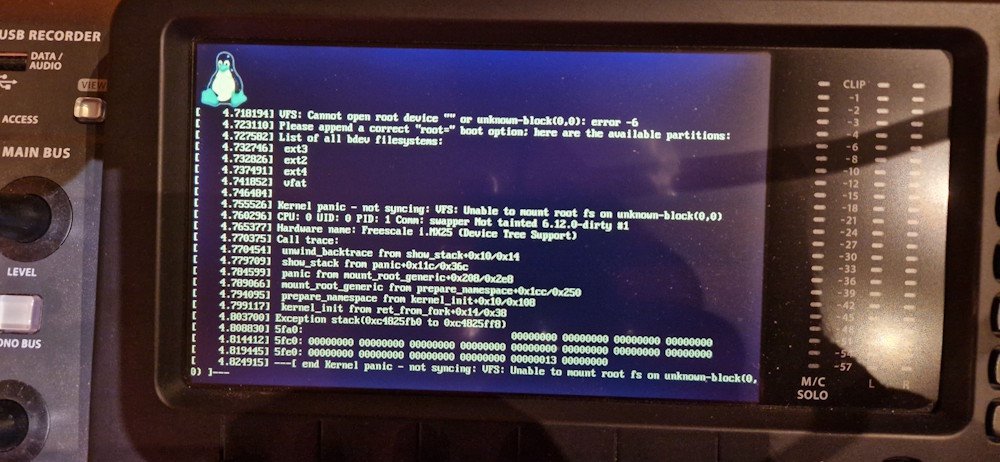
After a couple of days playing around with the several configurations of the i.MX253 I figured out how to boot the device using the U-Boot-Bootloader and finally the linux-kernel. Here on Chris.Dev.Blog you can read more about this journey: https://chrisdevblog.com/2025/06/23/linux-on-behringers-x32-openx32
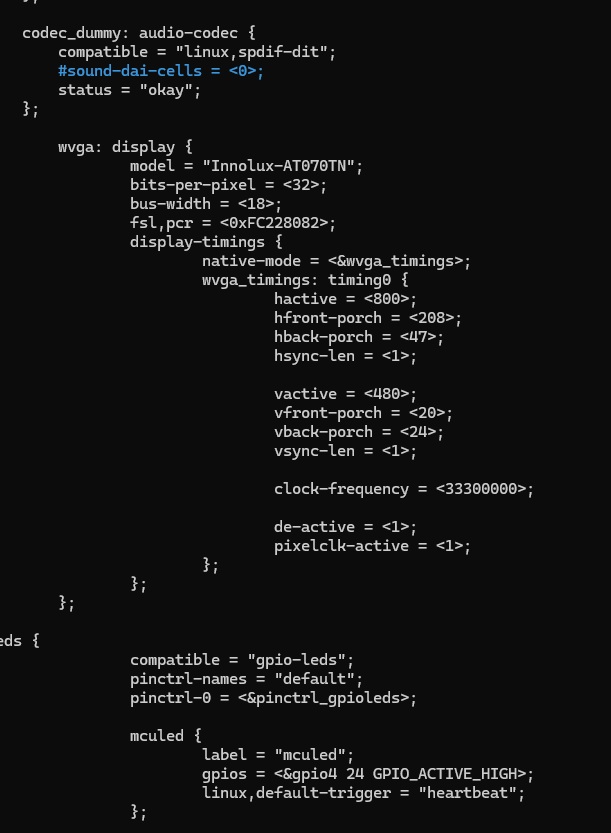
Alex and I spent lot of time on testing different settings within the linux-devicetree to get the display and other components into the desired state.
9 Months after the project has started, we implemented all important devices and peripheral interfaces to the display, the RAM, the DSPs, the FPGA, the realtime-clock and much more.
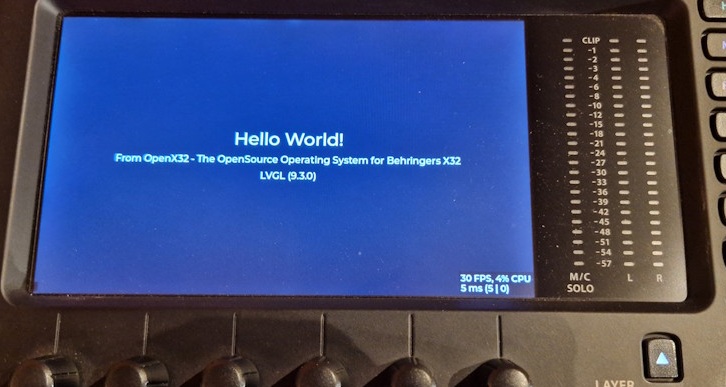
We started playing around with the linux-framebuffer and tested the LVGL-framework which did a really good job with a nice performace (here 30 FPS). Our first tests were quite promising and so Alex started working on a nice C and later C++ framework for the GUI. Since beginning of 2026 we have a very nice class-based page-system so its very easy to create new pages with a minimum of efford. Each page is connected to a callback-engine that updates only parts of the GUI which underlaying data has changed.
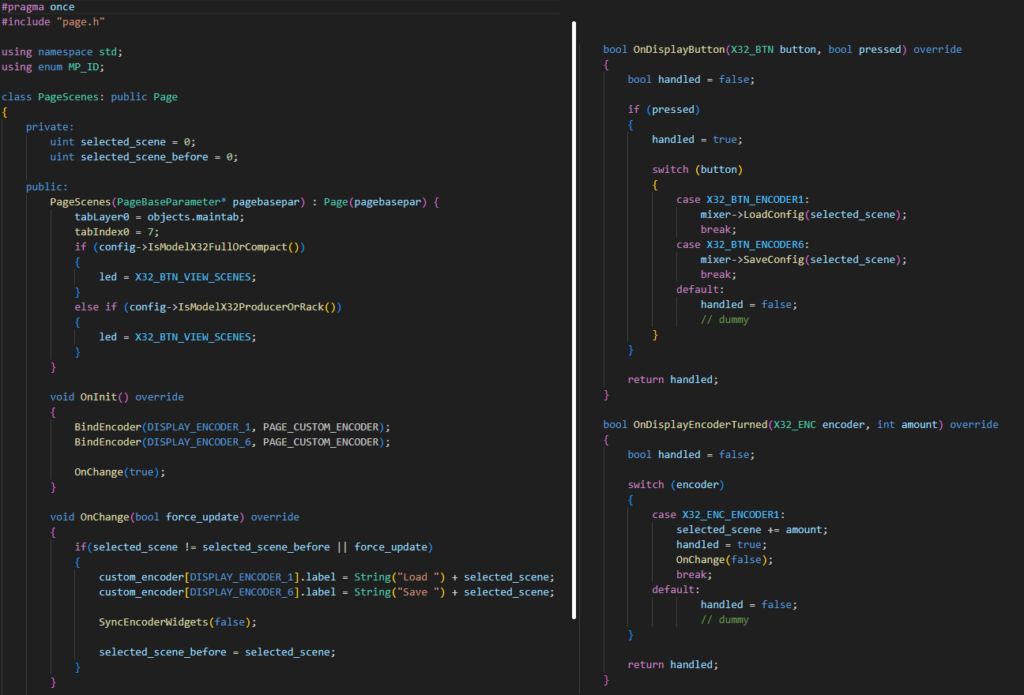
The following picture shows the code for a demo-page that registers two buttons of the display-encoders to load and save scenes. As you can see, the page can make use of the callback-functions OnInit(), OnChange(), OnDisplayButton() and OnDisplayEncoderTurned() as well as several other functions to interact with the user and the system:
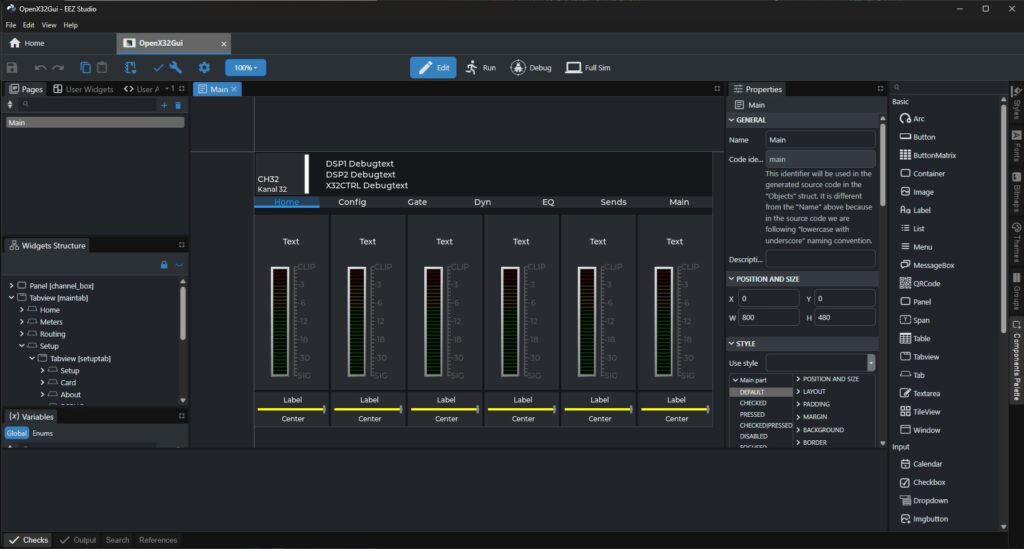
The design of the user-interface is done using a combination of working in the source-code using VSCode or another editor and the support of the open-source tool „EEZ-Studio“. This tool allows the creation, selection and placing of pre-designed and individual widgets to the GUI.
EEZ-Studio is a WYSIWYG-editor and is easy to use. It is not a fully-integrated IDE but the interaction between designing the GUI in EEZ-Studio and editing the code in VSCode is working flawlessly.
If you like to support us, feel free to checkout the project from GitHub and play around with the individual programs.
To get an overview of the invidual parts of the i.MX253 and the linux-based operating system, here are some general information about how we implemented OpenX32:
- The original X32 DCP-Loader loads a binary from an USB-Thumbdrive or the SD-Card into the RAM
- The DCP-Loader sets the program-counter (PC) to a specific place in the RAM to load more code. Here we placed a very small assembler-program that we called „miniloader“. This program helps to start U-Boot, the universal bootloader for Linux
- U-Boot checks the linux-devicetree and the linux-image itself. When everything is fine, the linux-kernel is started
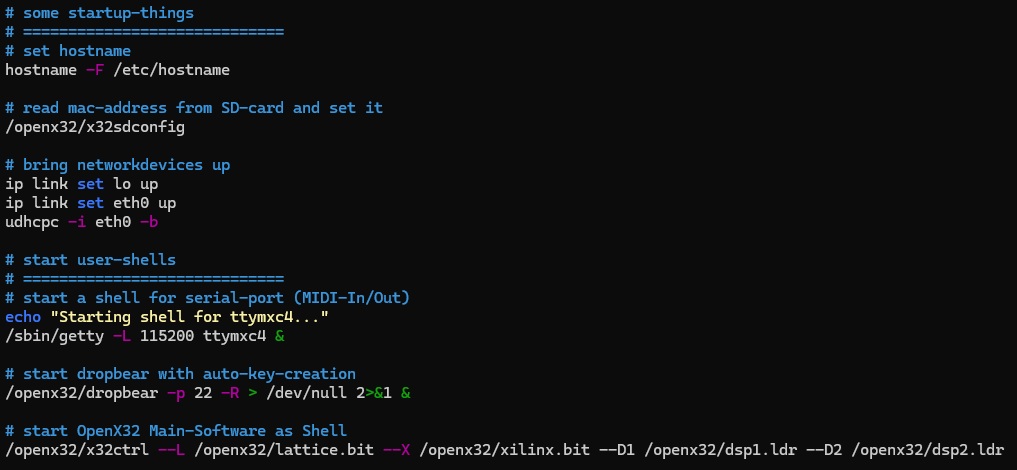
- When the Linux-Kernel is up and running we start the program called „x32sdconfig“ that loads a specific amount of data from the first part of the original SD-Card. Here the X32 stores information about the MAC-Address and information about what type of X32 is present (X32Core, Fullsize, Compact, Producer, etc.). The program stores the read values into /etc/x32.conf
- Now that we are awared of what kind of machine we are running on, we enable the udhcp-program to bring the network up. Dropbear is used as an SSH-server to connect to the OpenX32 system via ethernet.
Username: root
Passwort: openx32 - finally we start the main-UI with the program x32ctrl
We cannot go into the details of x32ctrl here as the codebase is growing with high-speed, but here are the main-steps after starting the application:
- start-parameters are parsed
- ctrl-class reads the configuration from /etc/x32.conf
- mixer-class is initialized
- surface-class is initialized
- xremote-class is initialized
- default DSP-parameters are set
- LVGL is initialized and everything is handed over to LVGL-main-timer
There are four main-timers, that control the whole thing:
LVGL-Main-timer
- all UI-elements are handled
- communication to linux-FrameBuffer is handled
- all backend-stuff for graphics is handled
10ms-Timer
- communication to DSP is handled
- communication with surface-boards is handled (faders and encoders)
- communication with boards for analog-input and -output is handled
- communication with AES50-devices is handled
50ms-Timer
- meters of the UI are updated if values have changed within DSP
100ms-Timer
- blinking of buttons on surface are handled
- debug-information in GUI are updated